When using Drawing Manager in conjunction with Revit you can setup as many Titleblocks as you like within Drawing Manager and configure their setup accordingly to be assigned when you start adding Sheets within the Drawing Manager database.
Once you Synchronize back to Revit then your project is updated with the sheets and Titleblocks generated from Drawing Manager.
For this reason it is recommended that your Company Revit Template should ideally not contain any ‘sheets’ which will then end up getting ‘imported’ into Drawing Manager.
Sheets should be created primarily in Drawing Manager using Defined Titleblocks also from within Drawing Manager and then pushed back into your Revit project when synchronized.
To define your Titleblock setup with Drawing manager go to the Project Settings Tab and then click the Config button to launch the Project Configuration dialog box then go to the Titleblocks Tab.
You are provided with a default RTV Tools titleblock with Drawing manager that can of course be deleted and replaced with your own Company specific titleblock setup.
Add: click the button to browse and define your Revit Titleblock family (.rfa) file to be used and add a new titleblock setup
Edit: click the button to edit / modify an existing titleblock setup
Delete: click the button to delete an existing titleblock setup
Duplicate: click the button to duplicate an existing titleblock setup and then modify as required
Import: click the button to import a titleblock setup from either another Drawing Manager project or Template in the SQL database
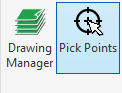
Show Pick Points Button: click to display the Pick Points button for Drawing manager on the RTV Tools Tab of the Revit Ribbon as shown below

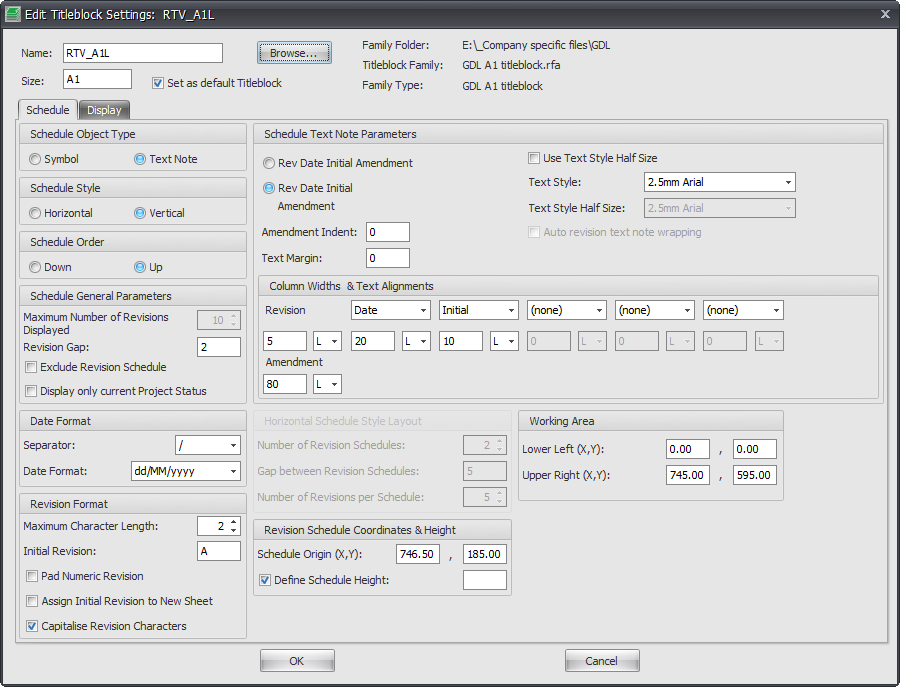
Schedule Tab
Schedule Object Type: choose from either a Symbol object or a Text Note to be used as the Revision Schedule. If selecting a Symbol you will need to Browse and define your Annotation Symbol Family to be used
Schedule Style: choose from either Horizontal or Vertical
Schedule Order: choose from either Down or Up
Maximum number of Revisions Displayed: set the number of Revisions you want to be displayed in the Revision Schedule
Revision Gap: set the spacing to be used between Revisions
Exclude Revision Schedule: if selected will not display the Revision Schedule on the current Titleblock when used in your project.
Display only current Project Status: if selected will only show revisions in relation to the current Project Status setting
Date Format: define the Date format and date separator to be used for Revision Dates in the Revision Schedule
Maximum Character length: set the maximum number of Characters to be used for Revisions
Initial Revision: you can set an initial revision character to be used as the first Revision on a Sheet if required or leave the field blank for no initial revision
Pad Numeric Revision: If selected will add a leading ‘0’ (zero) in front of the numeric value of the Revision so long as your Revision system incorporates a numeric value and not just letters
Assign Initial Revision to New Sheet: if selected will add the Initial revision character defined above automatically on creation of new Sheets
Capitalise Revision Characters: if selected will automatically force letters used in revisions to Upper Case
Schedule Text Note Parameters: choose a layout option for the Revision Text Note – Rev Date Initial Amendment will create a single row in revision schedule – or alternatively select the other option which will put the Revision Amendment note on a second row below the Rev Date initial values.
Amendment Indent: depending on which of the above layout options above is selected (only applicable to the 2 row option) then you can set an indent value for the Revision note itself on the second line or leave it set to zero for no indent
Text Margin: enter required value for the text margin or leave set to zero for no margin
Text Style: Select the required Revit Text Style to be used for revision notes
Auto Revision Text Note Wrapping: is only applicable for single line revision note format and if selected will allow wrapping of text notes
Column Widths & Text alignments: Define which Columns you want to utilise with the Revision Notes (you do not need to use all columns if you don’t want to) and then for each column enabled set the Column width and justification required
Horizontal Schedule Style Layout: only applicable if you have selected the Horizontal Schedule Style to begin with.
- Set the number of Revision Schedules required (the number of revision schedule columns)
- Set the value for the gap to be used between revision schedule columns
- Set the max number of Revisions (rows) to be displayed per Revision Schedule column
Revision Schedule Coordinate Height: define the Revision Schedule X,Y coordinate value relative to your Titleblock Family Origin point. If the Schedule order is set to be Down then the Revision Schedule Origin coordinate is the Top Left corner of Schedule. If the Schedule order is set to be UP then the Revision Schedule Origin coordinate is the Bottom Left corner of Schedule. Note: that if you enable and set a value for the Schedule Height this will disable and override any values set for the Maximum number of Revisions to be displayed for both vertical and Horizontal layouts.
Working Area: define the X,Y coordinates for the lower left and upper right corners to define the available clear drawing area within your titleblock where drawing views are to be placed
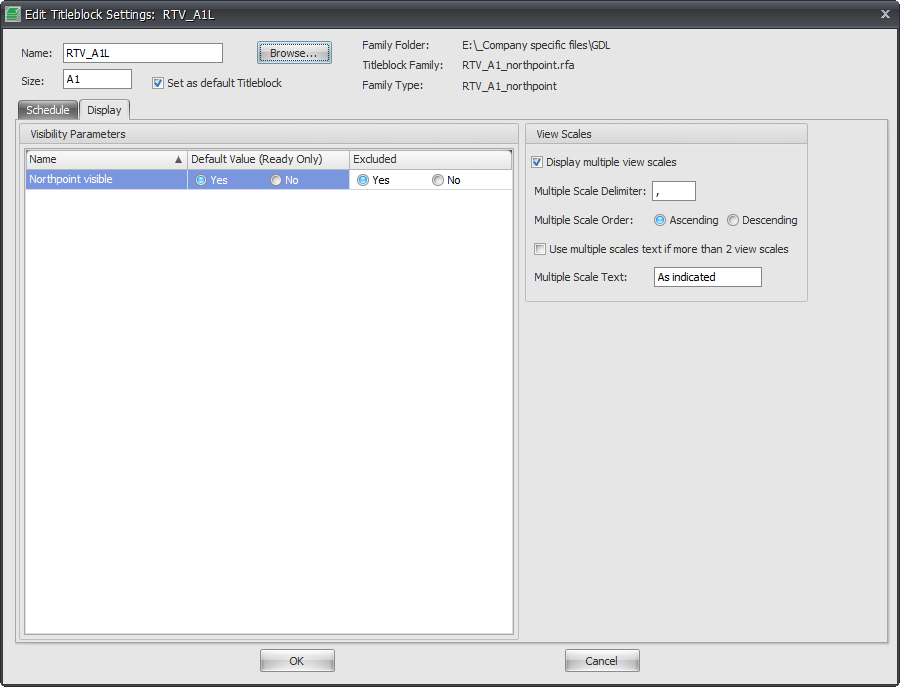
Display Tab
View Scales: if you want to display multiple scales in your titleblock tick the box for actual view scales to be displayed
Multiple Scale delimiter: define a character to be used for separating multiple scales
Multiple scale order: when more than one scale is relevant select from either Ascending or Descending order
Use multiple scales text if more than 2 scales: is enabled then the actual view scales will be hidden and replaced with whatever you define as the Multiple Scales Test to be displayed
Multiple Scale Text: enter the text to be displayed in place of view scales when above tickbox is enabled.
Visibility Parameters: This window will only become active if your titleblock family contains elements with a Visibility Parameter Control on them such as Northpoints, Company Address details for different office locations within the same company etc. The default Value column setting is simply reading the Default setting from your Revit Titleblock family itself as a read only value that cannot be changed by Drawing manager itself. The Excluded Column setting options (yes or no) is what will control whether the element is visible on the sheet or not via Drawing Manager. You can have multiple Visibility Parameters present within the same titleblock that can be controlled with Drawing Manager.