Once Xporter Pro 2018 or later is installed you will need to either navigate to the following default location in order to launch the RTV Scheduler GUI interface;
C:\Program Files\RTV Tools\Xporter Pro 2018\RTVXporterProScheduler.exe
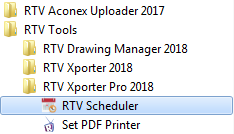
Or you can click the RTV Scheduler shortcut from the Programs Menu as shown below
Once Launched you will see the Main User interface for RTV Scheduler as per below.

Home Tab:

Previous: Click to move to the previous task within the visible area of the view
Next: Click to move to the next task within the visible area of the view
Queue List: Click to launch the Queue list window which will display Task Status in the queue
Queue Monitor: Click to manually start the Queue monitoring service that processes the scheduled tasks
Queue Settings: Click to launch Queue Settings dialog box to define the queue monitoring interval and enable/disable the autostart option
1 Day: Click to change the view to 1 Day mode to give the most detailed display of tasks for a specific day.
5 Days: Click to change the view to Working Week view (M/T/W/T/F) for a specified week
7 Days: Click to change the view to a full Week view including weekends for a specified week
Month: Click to change the view to a Monthly view which may be more useful for longer term repeating tasks
Refresh Data: Click to refresh the Task data displayed in the current view. Note that new tasks will not be displayed until the Queue Monitoring interval has been reached.
Export Types: Click to launch the Export Types dialog where you can define the various Export Types and assign a Task Colour
Time Scale: This button will only be active when the view mode is set to either 1 Day or 5 Days. Click to set the time increments displayed in the view
Compress Weekend: This button will only be active when the view mode is set to Month. Click to compress Sat/Sun to a single column in the view
Watched Folders: Click to launch the Watch Folder dialog where you must define the Shared Network Watch Folders that will be processed by the Queue Monitoring service.
Revit Applications: Click to launch the Revit Applications dialog where you must define all of the various Revit.exe paths and associated log folders required for each Revit Release in order to process tasks with the correct Revit version.
Report Tab:
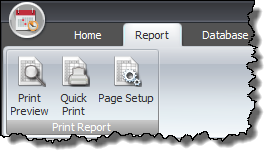
Print preview: Click to preview the report and make any changes required prior to printing
Quick Print: Click to send the schedule view to your default printer without previewing or making any changes.
Page Setup: Click to launch the Page Setup dialog and define the required page appearance print options.
Database Tab:
Scheduler Database Panel
Browse Server: Click to launch the located SQL Servers dialog and define the correct SQL Database that will be used by RTV Scheduler
Backup Database: Click to create a backup of the Scheduler SQL database
Login Authentication: Click to launch the SQL Server Authentication dialog and define the Authentication mode to be used. You can use either SQL Server Authentication or Windows Authentication to access the Scheduler Database.
Monitoring Service Panel
Browse Server: Click to launch the located SQL Servers dialog and define the correct SQL Database for the Monitoring Service
Login Authentication: Click to launch the SQL Server Authentication dialog to enter the SQL Authentication credentials. Note that you MUST use SQL Server Authentication that has ‘sysadmin’ permissions in place for the Monitoring Service and not Windows Authentication which may not have sufficient permissions for the service to run.
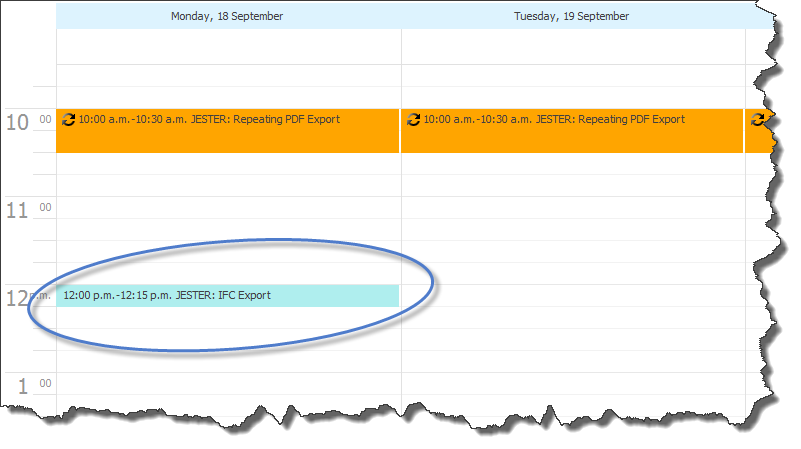
When a Remote Task is present in the view you can manually drag that task around to change the scheduled run time either within the same day or you can even drag it to a different day as shown below
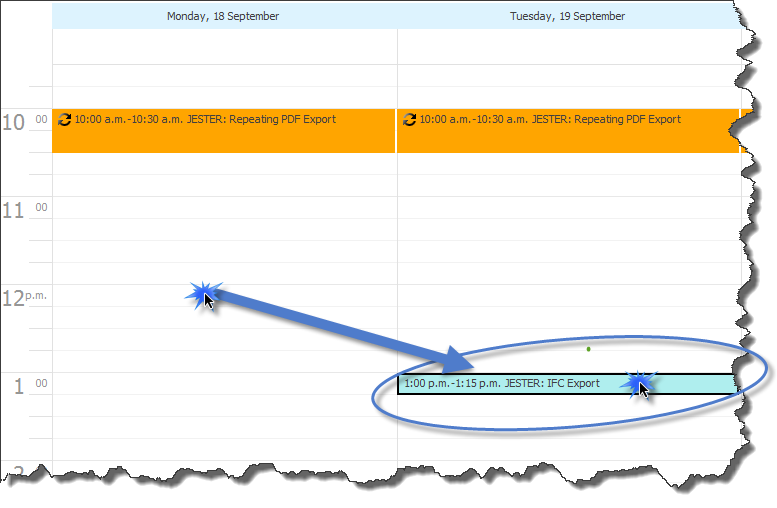
For repeating Remote Tasks where it is initially set to trigger at the same time each day you can still drag an individual occurrence in the view to a different time slot if required.

To return the individual occurrence back to its original state in the series right click on the task in the view and select Restore Default State.
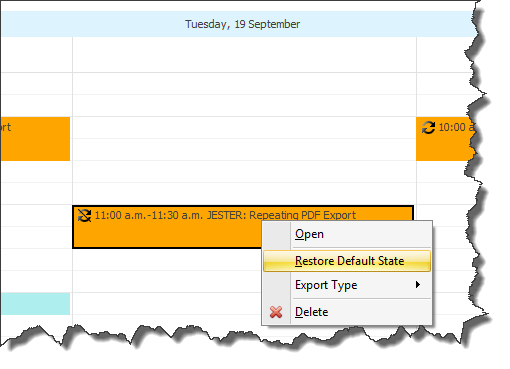
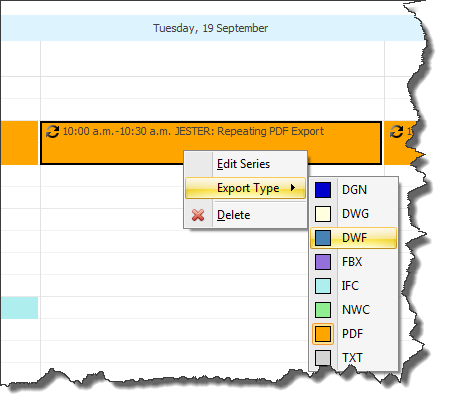
If you right click on a task in the view and select Export Type you can then change the Export type which will also change the colour of the task in the view.
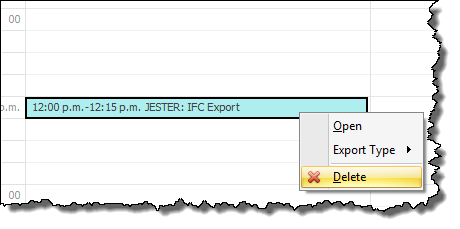
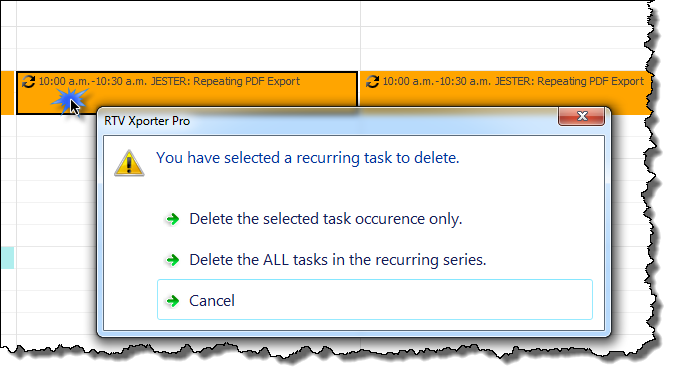
To delete an individual Task from the view right click and select Delete. For a series of recurring Tasks right click on any occurrence to select Delete which will then display a dialog box allowing you to chose if it is just the selected occurrence or ALL tasks in the series to be deleted as shown below.