Once you start generating Issues with Drawing Manager they will be stored in the Drawing Manager SQL database as a historical record that can be recalled and referred to at any point.
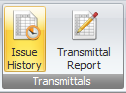
To access the Issues Register click on the Issue History button from the Home Tab of the ribbon as shown below.
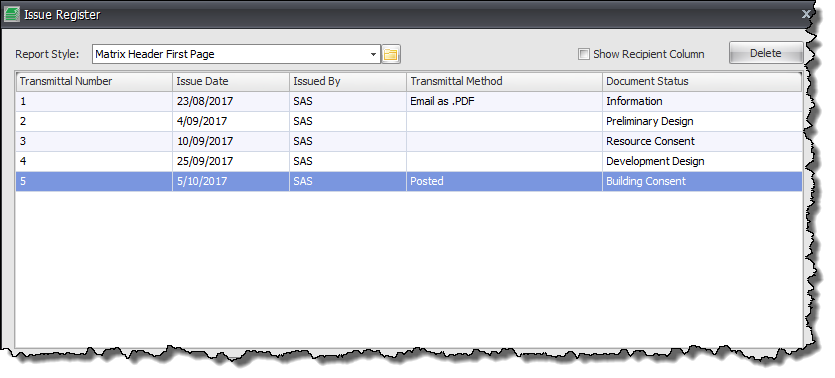
The top half of the Issue Register dialog box will display a complete list of all Issues that have been generated for the project to date in order to then generate an associated Document Transmittal.
Report Style: select from the drop down list the required report style to be used for the Document Transmittal Report.
Show Recipient Columns: if enabled will also display the Recipient Column in the data grid below for each Issue.
Delete: clicking the Delete Button will delete the highlighted Issue from the database if required.
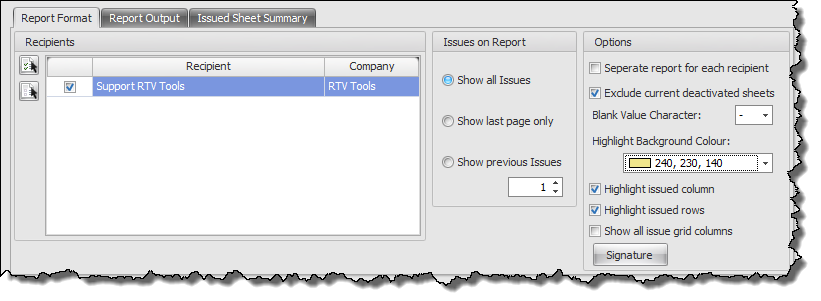
The bottom half of the Issues Register dialog box provides the options and settings located on three separate Tabs to generate a Transmittal Report for the selected Issue.
Report Format Tab
Recipients: displays the recipients to be included for the selected Issue
Select ALL: click to set all listed Recipients Active to be included on the Transmittal Report
Clear ALL: click to clear all listed Recipients to be excluded from the Transmittal Report
Show ALL Issues: if selected will display ALL issues on the resulting Transmittal Report
Show Last page only: if selected will only display the last page of Issues being the most recent Issues. Note – only applicable when enough issues have been generated to flow over to more than one page for the Transmittal report.
Show Previous Issues: if selected will allow you to specify the required number of previous issues to be shown on the Transmittal Report
Separate Report for each recipient: if selected will generate separate Transmittal Reports for the selected Issue for each active recipient for privacy such as in a Tender Issue scenario. Note – if not selected then if multiple recipients are active for the selected Issue they will all be displayed on the resulting transmittal report.
Exclude current deactivated sheets: if selected any deactivated sheets that have been selected in the Issue will be excluded and not appear on the resulting Transmittal Report. Note- if you don’t select this option then any sheets that may have been previously deactivated for the intention of excluding them from Issues will actually still appear on the resulting Transmittal Report.
Blank Value Character: allows you to set a default character to be used for non-issued sheets instead of having just a blank cell in the Transmittal Report.
Highlight Background Colour: allows you to define a shading colour to be used to graphically highlight the Issue column and rows if required.
Highlight Issued Column: if enabled will highlight the current Issue Column using the highlight colour defined above
Highlight issued rows: if enabled will highlight the current Issue Rows using the highlight colour defined above
Show all issue grid columns: if enabled will display ALL issue grid columns on the transmittal report whether populated or not. If not selected then you will only see ‘populated’ issue columns appear on the Transmittal Report
Signature: click to define a signature image file to be used on the resulting Transmittal Report.
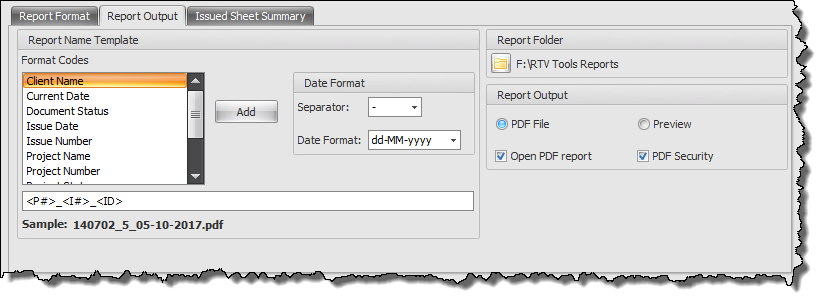
Report Output Tab
Report Name Template panel: provide the means to determine your file naming convention. Use the Format codes list to create the desired combination for the file name template (a dynamic sample preview is displayed below as a guide).
Date Format: Use the date format options to select the required date format and date separator.
Report Output Panel: choose to either generate an actual PDF copy of the report or just preview the report without generating a PDF as well as options to open the PDF report once created and add PDF security or not.
Report Folder: click the browse button to define the required output folder for PDF reports to be used.
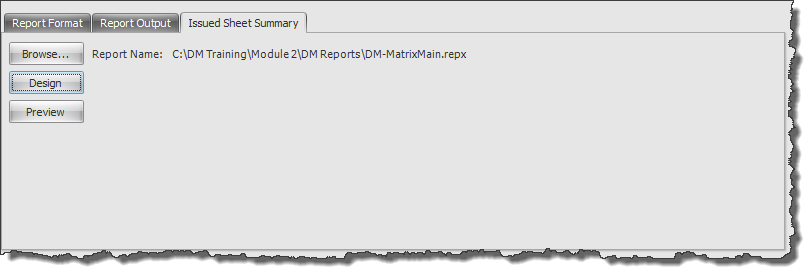
Issued Sheet Summary Tab
Browse: click to browse to and define your Sheet Summary report template file to be used if required.
Design: click to either create a new report style or edit an existing report using Report Designer.
Preview: click to see a preview of the Issued Sheet Summary report