
Important:
From Xporter Pro 2018 and future releases the Remote Server functionality has now been replaced with the newer RTV Scheduler interface instead as outlined below. Users with Xporter Pro 2017 or older versions will still need to use the Remote Server GUI interface instead.
The Xporter Pro Scheduler GUI is intended for use by BIM Managers within Large organisations for advanced options to configure Remote Scheduled Tasks using Shared Network Locations from a designated Server on your network.
In order to use the Xporter Pro Scheduler utility you will need to have installed both Revit and Xporter Pro applications on the Remote Server itself as the machine that will process the Remote tasks. Once Xporter Pro 2018 or later is installed navigate to the following default directory where you will find the required executable to install the Scheduler Monitoring Service.
C:\Program Files\RTV Tools\Xporter Pro 2018\Monitoring Service Setup\Setup.exe
Once Xporter Pro 2018 or later is installed you will need to navigate to the following default location in order to launch the RTV Scheduler GUI interface;
C:\Program Files\RTV Tools\Xporter Pro 2018\RTVXporterProScheduler.exe
The RTV Scheduler utility works in conjunction with a previously installed SQL database.
Note: It is recommended that you create a specific SQL user with ‘sysadmin’ rights to the database which can be used for RTV Scheduler.
Before you try to set up any remote batch processes etc you need to do the following setup within RTV Scheduler itself.
1 SQL Database Setup:
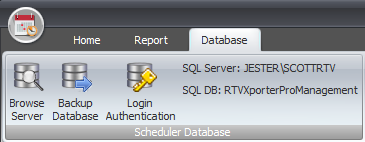
- Go to the Database Tab of the Scheduler ribbon and click the Login Authentication button on the Scheduler Database Panel as shown below.
- Enter the specific SQL sysadmin login credentials to access the appropriate SQL database
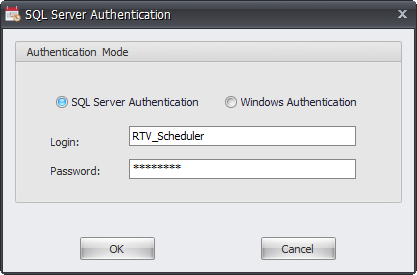
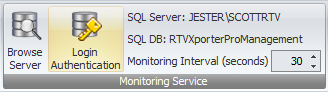
- Then click the Login Authentication button from the Monitoring Service Panel as shown below. (this must be a SQL Server Authentication login and not a Windows Authentication login)
- Enter the specific SQL sysadmin login credentials to access the appropriate SQL database

2 Watch Folder Setup:
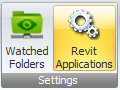
Once the SQL Database setup has been established go to the Home Tab and click the Watched folders button from the Settings Panel of the Scheduler Ribbon as shown below.

This will launch the Watch Folders dialog box where you can load in required watch folders which must be Shared Network Folders that all users can access on the network.
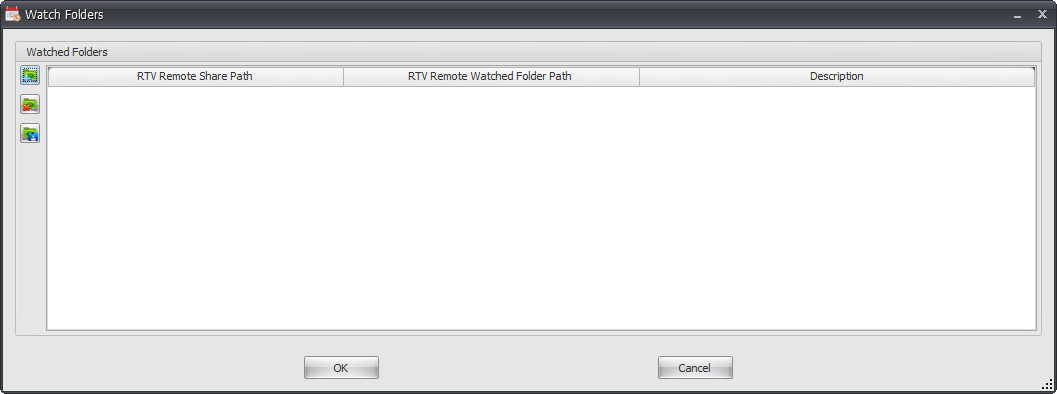
Click the Add Folders button to add Shared Network Folders as per below. You can add numerous Shared Folder locations and enter descriptions for each if required.
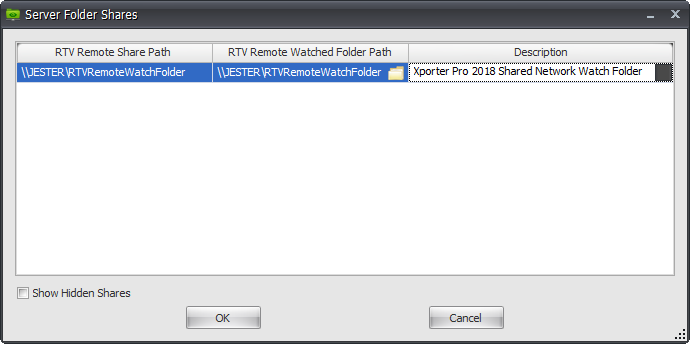
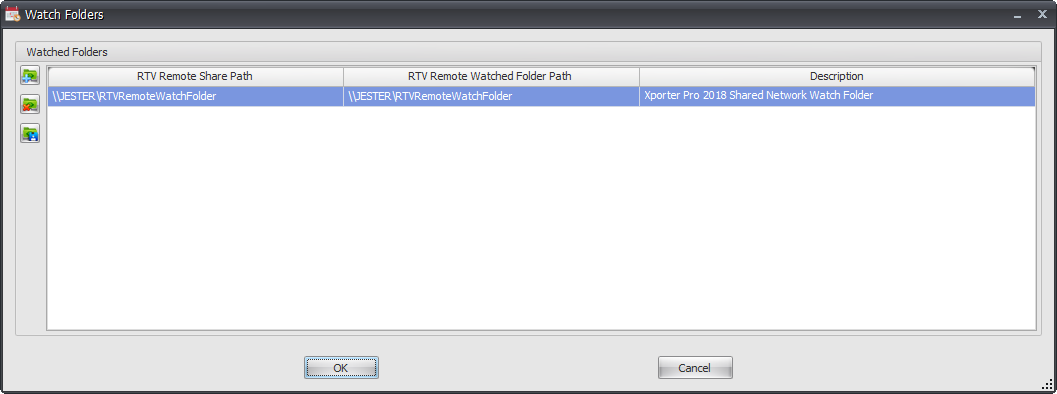
Any Shared Folders added will then be displayed on the Watch Folder dialog box.
![]() Click the Add Folders button to launch the Shared Folders dialog box and define Shared Folder locations.
Click the Add Folders button to launch the Shared Folders dialog box and define Shared Folder locations.
![]() Click to Remove a previously defined Shared Folder location from the Watch Folder list.
Click to Remove a previously defined Shared Folder location from the Watch Folder list.
![]() Click to Export the Remote Server shared folder list to an .xml file which must then be used by other users when creating remote tasks from their local Xporter Pro interface.
Click to Export the Remote Server shared folder list to an .xml file which must then be used by other users when creating remote tasks from their local Xporter Pro interface.
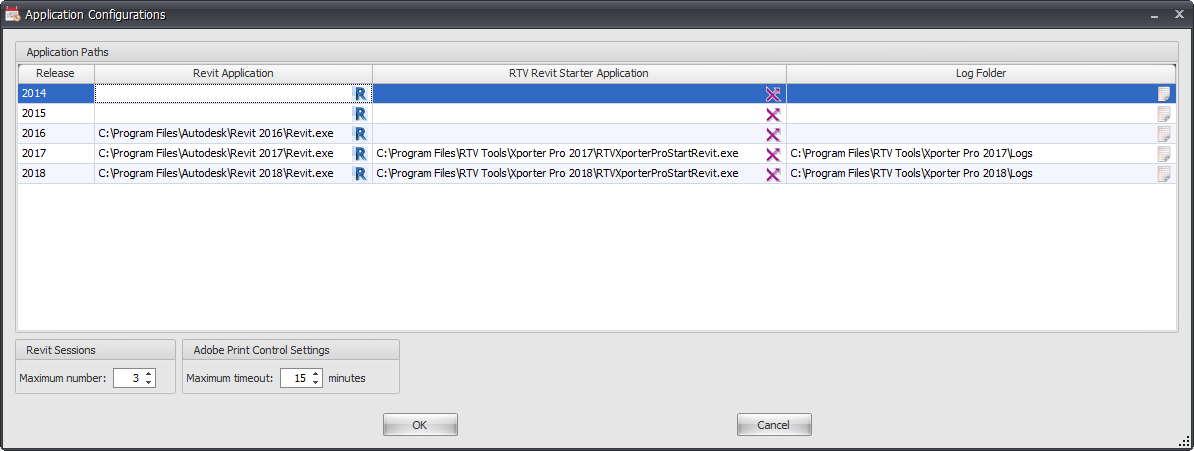
3 Define Revit Applications:
As you will most likely have more than one version of Revit installed you can configure the RTV Scheduler to locate the Revit.exe location for each installed version which will then be used when the Scheduled Tasks are triggered to run.
On the Home Tab of the Scheduler Ribbon click the Revit Applications button from the Settings Panel to launch the Revit Applications dialog.
For each version of Revit required you will need to define the Revit.exe location, the RTV Revit Starter Application, and a Log folder path as per below example. You can also set the maximum number of Revit Sessions that can run at once, and you can set the Maximum timeout value as required for large projects. If a particular sheet or view for any reason hangs when generating PDF’s and reaches the timeout value, then the Adobe Print queue will be cleared so that any other subsequent batch processes can then run.
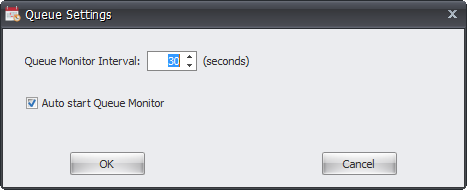
4 Queue Monitor Setup:
If you click on the Queue Settings button from the Home Tab of the Scheduler Ribbon you can define the Queue monitoring interval as required. It is recommended that when installing and running on a Network Server you turn on the Auto Start Queue Monitor option so that if a server restart occurs the Queue Monitoring Service will automatically start.
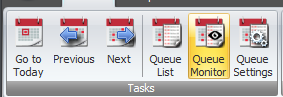
When you first setup RTV Scheduler you will need to click the Queue Monitor button to manually start the Queue Monitoring Service which processes the Scheduled Tasks.
If the Autostart option above is enabled then you should not need to manually start the Queue monitoring service again however if the Autostart option is disabled then you will still need to manually start the Queue Monitoring service to process scheduled tasks in the event of a server restart.
Once Remote Tasks have been setup using Batch Processes and Scheduled Tasks Xporter Pro will then create a new Sub-folder for each Remote Task inside the designated Shared Network Watch Folder will all the required config files automatically as per below example.
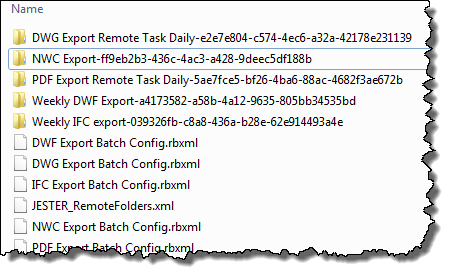
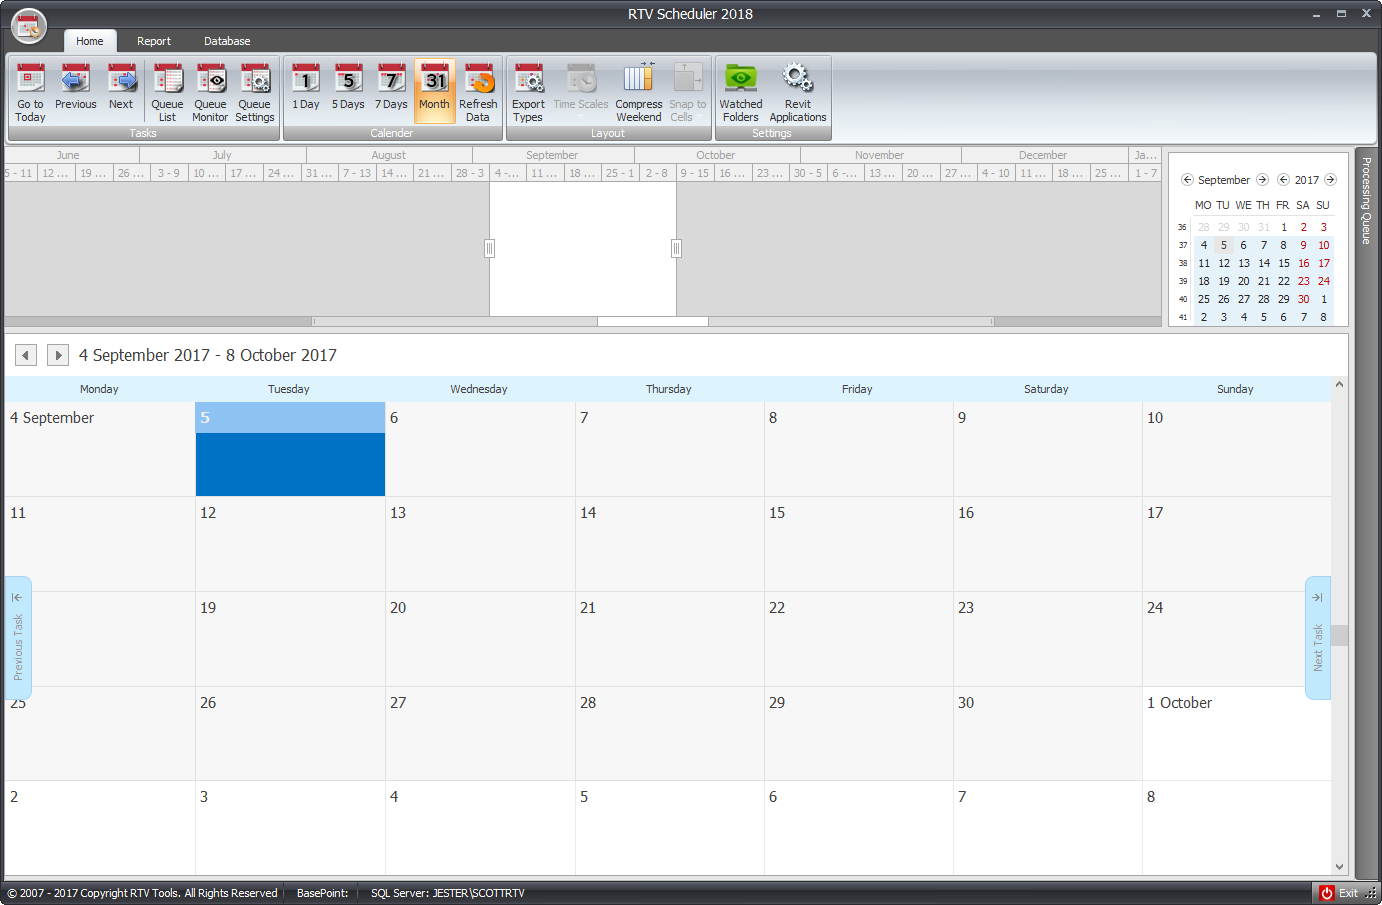
The installed Queue monitoring service will then check the watch folder for any new Tasks to appear in the Scheduler Interface accordingly as per below example where multiple Tasks have been programmed in as Remote Tasks.
